Engine Drive Belts
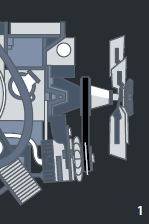
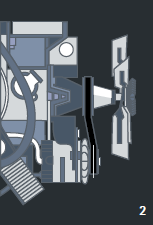
Micro-V® Belt Installation GuideStep 4 – Check for misalignment While replacing the belt, check the alignment of the pulleys as this is a very critical factor for multi-ribbed belts. Misalignment can cause severe belt wear and damage. It can also create noise or cause belts to jump off the pulleys. Misalignment can be caused by non-parallel shafts on drive accessories (picture 1) or pulleys located incorrectly on the shafts (picture 2).
If misalignment is due to non-parallel shafts, it may be caused by a damaged accessory bracket. Replace the bracket if necessary. The accessory pulley may be seated too far forward or backward on the shaft. In this case, add or remove metal shims to reposition the pulley or accessory. Misalignment is now easy to diagnose thanks to Gates DriveAlign® laser alignment tool, which allows you to identify the two most common types of misalignment in serpentine belt systems, even in the tight confines of the engine compartment. Simply position the tool within the grooves of a pulley and aim its bright laser beam at an opposite pulley. Any misalignment is instantly visible. This exclusive lightweight and easy-to-use Gates tool is compatible with all automotive serpentine belt drives. |
Related Articles Related Downloads |
| Previous page | Next page |