Engine Drive Belts
Micro-V® Belt Installation GuideGates Micro-V® XF belts are designed to meet or exceed original equipment requirements. These high-quality belts provide a superior product line for all applications and offer a perfect fit and large market coverage. They guarantee a dependable service, if they are properly installed and maintained. Remember! These are only general guidelines. Always refer to the vehicle manufacturer’s recommended procedures for replacement, tensioning and maintenance of multi-ribbed belts. Failure to follow these instructions could result in injury or property damage. Gates disclaims all liability due to failure to follow these instructions. Step 1 – Safety first First and foremost, for your own safety, disconnect the car’s battery and set the hand brake. Step 2 – Check belt routing Before removing the old belt on a serpentine drive, look under the bonnet and around the engine compartment for the belt routing diagram or consult Gates Drive Systems Application catalogue. Step 3 – Release tension
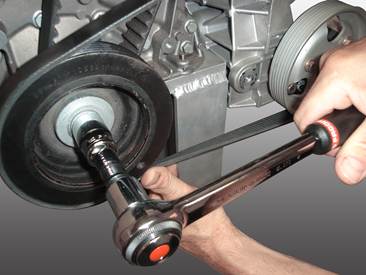
You can easily slide the belt off the pulleys, once the tension is relieved. Many new cars use an automatic tensioner which makes servicing easy. Release the tension by means of a spanner or socket wrench and block the tensioner in the retracted position. Always check the condition of the automatic tensioner. If it is not functioning properly, replace it with a Gates DriveAlign® tensioner. Other cars use tensioners or accessories which have to be locked down manually to provide the correct tension. These are called locked centre drives. To remove the belt, release the tension by loosening the jackscrew. |
Related Articles Related Downloads |

| Next page |