Engine Timing

Timing Belt Installation GuideToday’s highly sophisticated car engines operate at higher temperatures and higher speeds. Also, pulley diameters are smaller to save space under the bonnet and practically all engines now have overhead camshafts.
These increasingly severe conditions put more stress on timing belts. A quality timing belt provides quiet, reliable, low maintenance performance mile after mile. For maximum durability, and to avoid premature engine failure, only OE equivalent belts should be used. A quality timing belt will provide you with a long service if they are properly installed and maintained. Therefore, they have to be fitted in accordance with the car manufacturer’s instructions to make sure that belt tension and engine timing are correct. Before installing a new timing belt, read through this information and ask yourself the following questions: • Are you replacing the belt because the old timing belt broke, or is this a general maintenance procedure? • If the old belt broke, is the engine operational? • Have you previously installed a timing belt on this engine? • Do you have the installation instructions and tension specifications from the car manufacturer’s service manual? • Do you have the required tools? How you answer these questions is very important. If the old belt broke, the engine of the vehicle may have sustained damage that must be repaired prior to the installation of a new belt. The timing belt troubleshooting article may help to determine the cause of belt wear or failure. Different engine designs use various timing belt configurations to perform different functions. To give you an idea of what steps need to be taken in a job of this type, here is the step-by-step procedure recommended by one manufacturer. Remember, this is just an example. It is very important that you check the vehicle manufacturer’s maintenance manual for specific instructions. Belt Removal
Step 1 Make sure the engine is cold before you start working on it. *Disconnect the battery earth cable. Step 2 Turn the crankshaft (in the direction of normal rotation) to TDC by aligning the “O” timing mark on the crankshaft damper. The distributor rotor should be lined up with the index mark on the distributor body. Step 3 Remove any belts, pulleys or hoses interfering with the removal of the timing belt cover.
Remove the timing belt cover. Step 5 Loosen the belt tensioner adjustment bolt. Step 6 Pry the tensioner away from the belt and retighten the tensioner adjustment bolt. Step 7 Remove the timing belt. Step 8 Carefully inspect the drive. Poor drive alignment, improper belt tension and worn pulleys all contribute to early belt failure. In case of excessive wear, replace the drive component immediately. *Useful tip: If the car radio has programmed broadcasting stations, write down the positions of the stations before you disconnect the battery. That way you can reset the radio when the replacement job is done. Belt Installation
Make sure the timing marks are properly aligned as follows: Crankshaft pointer at TDC. Distributor rotor aligned with timing mark on distributor housing. Camshaft pulley timing pointer aligned with mark on engine block. Step 2 Place the new belt over the pulleys, but be careful not to force it. Never reinstall a used belt, as tension values are calculated for new belts. Step 3 Loosen the tensioner adjustment bolt slowly, so that it can swing back against the belt. Be careful to ease the tensioner into position. Do not let it strike the belt a hard blow. Make sure the tensioner spring is engaged properly. If there is no spring-loaded tensioner, tension the belt according to the vehicle manufacturer’s recommendations. Step 4 Rotate crankshaft (in the direction of normal rotation) at least two complete turns to remove any slack in the belt and to allow the teeth of the belt to seat themselves perfectly in the pulley grooves. Step 5 Loosen the tensioner and retension the belt according to the vehicle manufacturer’s recommendations. When the drive has a fixed tensioner, check the tension with Gates STT-1 sonic tension tester. Torque the tensioner adjustment and pivot bolts to the manufacturer’s recommended torque setting.
Reinstall the timing belt cover and all parts that have been removed. Torque all bolts to the manufacturer’s recommended torque setting. Step 7 Reconnect the battery earth cable.
Start the engine, check the ignition timing and make any necessary adjustments. Reprogramme the radio stations.
As stated earlier, this is a procedure recommended by one manufacturer. These steps can differ significantly for the same job on another model or make of car.
Timing belt kits such as Gates PowerGrip® Kits offer the perfect solution to such repair jobs.
|
Related Articles Related Downloads |


 Step 4
 Step 1
 Step 6
 Step 8
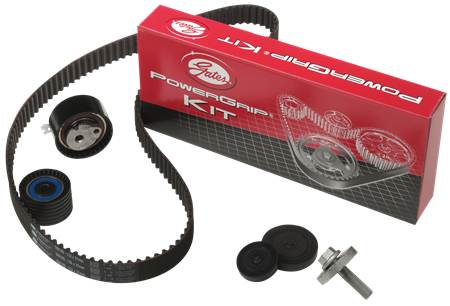 If you have to replace one component of the drive, make sure you also replace the other components: it is highly probable that the source of damage to one element will have also affected the other components of the system. The best way to guarantee your customers a reliable drive system is to change belts and metal components at the same time.