Storage and Transfer

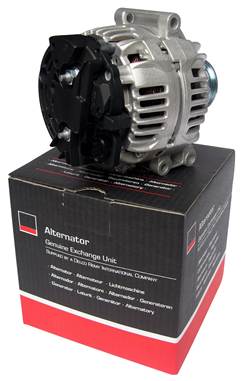
Rotating Electrics TroubleshootingRemy Automotive is the UK’s largest rotating electrics remanufacturer, having significant experience in examining the types of problems that occur with both alternators and starters which are linked directly to the battery. Here, Remy provide technicians with some simple, positive troubleshooting tips in both product categories: Alternator Troubleshooting
To test the charging circuit, all of the following three tests should be performed with the engine running at approx. 2,000 rpm – and with the lights and heater switched on. Please remember to always use extreme caution when working around an operating engine. 1. Voltage test: First measure the voltage from the positive battery post to the negative battery post. A good reading is between approx 13v-15v. A higher reading may indicate a bad regulator and the vehicle must not then be operated. If the reading is lower than 13v then check both the following: battery – a weak or defective battery will cause other components to appear faulty, and, belts – loose, worn, cracked or glazed belts will slip, resulting in low output from the alternator. 2. Negative battery cables and connections: Connections from the battery to the frame/chassis and engine block must be clean, tight and corrosion free. To verify this, take a voltage measurement from the alternator case, ground and negative battery post. A reading higher than 0.25v indicates a problem with the negative side of the circuit, such as negative battery cable, connection to the frame or chassis engine block. 3. Positive battery cables and connections: Connections from the positive battery post to the alternator output terminal, positive cable and fusible links, should all be clean, tight and corrosion free. To verify this, measure from the alternator output terminal to the positive battery post. A reading higher than 0.35v indicates a problem with the positive side of the circuit. If the reading is higher than 0.75v, look for blown fuses, swollen or discoloured fusible links or an open/broken wire/cable.
Starter Motor Troubleshooting
1. Install the starter motor and fasten all electrical connections securely. 2. Connect a voltmeter to the starter motor - black lead to the starter frame/case, red lead to the "S" terminal. 3. Attempt to crank the engine. If the engine does not crank and the voltage is less than 12v, check for poor ground connection, weak battery, bad ignition switch or defective neutral safety switch. 4. If the engine does not crank and the voltage is more than 12v, move the red wire of the voltmeter to the starter B+ terminal, turn the ignition key to crank the engine and observe the voltmeter reading. If there is no crank and the voltage is less than 12v, then check for a weak/bad battery and loose or corroded cables. 5. If there is no crank and the voltage is less than 9v this could possibly damage the new starter. This condition must be corrected to prevent a repeat failure. Check for a weak/bad battery and loose or corroded cables. |
Related Articles Related Downloads |
 In the majority of problem cases related to the battery, the warning lamp on the vehicle dashboard will indicate a charging circuit problem. A voltmeter should then be used to isolate a faulty component within the charging system.
 When a starting problem occurs after mounting the replacement starter motor, immediately check for correct voltage on the vehicle through the following steps. Remember again to use extreme caution when working around an operating engine: